User List
The User List section in the WP500 Gateway allows administrators to manage user accounts efficiently. This section provides tools for adding, modifying, and controlling access permissions for all users, ensuring secure and organized management of your system.
Adding a User
Follow the steps below to add a new user and manage the user list.
- Go to the User List section of the WP500 web interface.
- Click on the Add User button to open the user creation form.
- Fill User Details
|
Field |
Description |
|
Username |
Enter a unique username for the new user. |
|
First Name |
Enter the user's first name. |
|
Last Name |
Enter the user's last name. |
|
Email ID |
Enter the user’s email address. |
|
Role |
Select the appropriate role for the user from the available options:
|
- Enter a secure password for the user. Ensure it meets the system's password policy requirements.
- Click Save to add the user to the system.
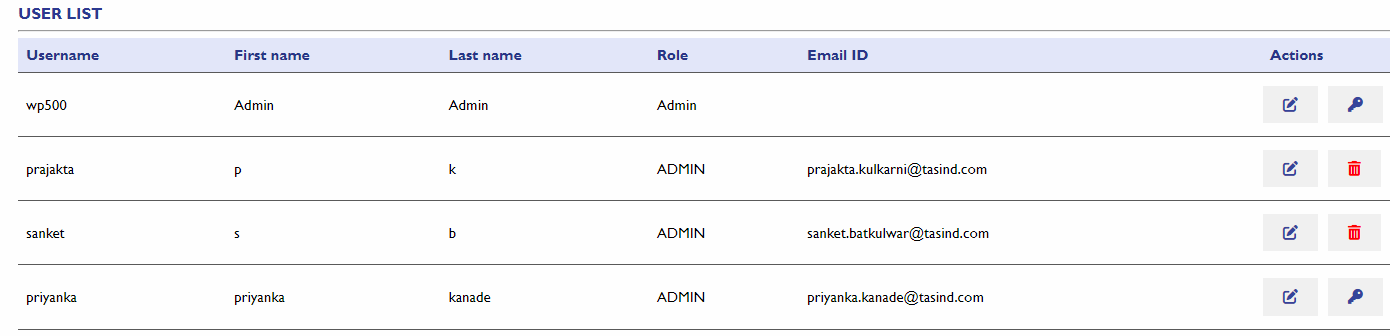
- After adding the user, verify that the new user appears in the "User List" with the correct details.

Notes:
- Ensure to follow the password policy for secure credentials.
- Users with the role "SUPERUSER" will not be able to log in via the web portal but can access other system functionalities as defined by their role.
Managing Users:
From the user list, you can select any user to modify their details, such as updating their password or changing their role. If necessary, you can also delete users from the system to revoke access.
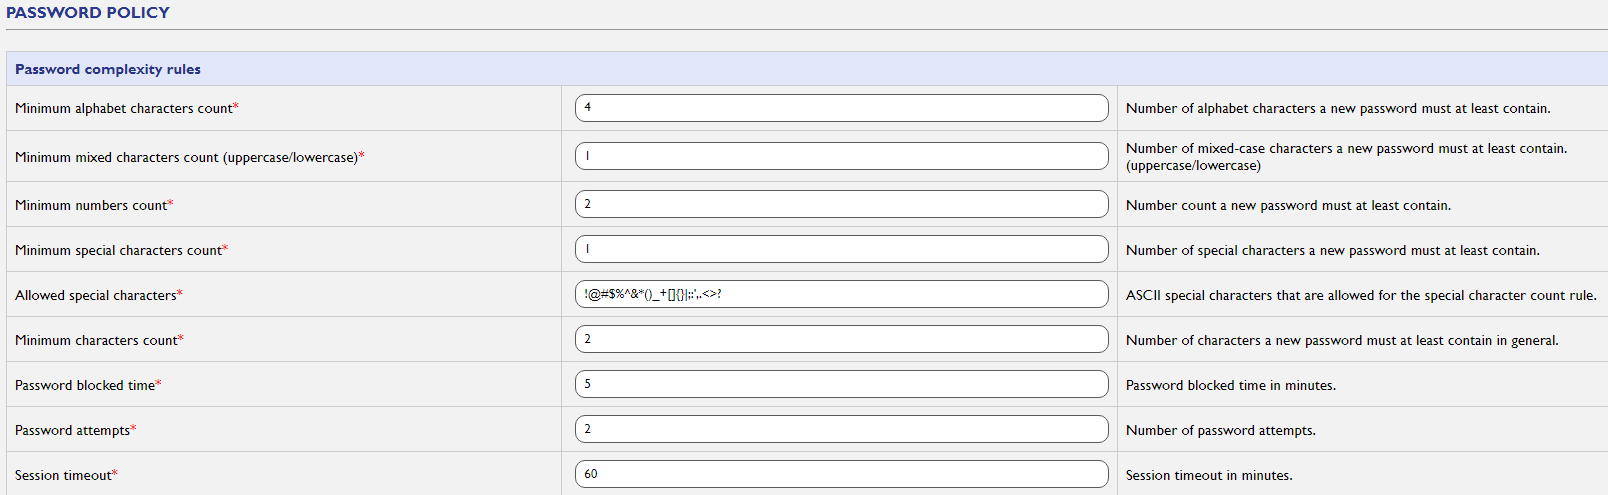
Configurable Password Criteria:
The Password Policy section in the WP500 Gateway provides administrators with the ability to customize and enforce password requirements for system users. By defining specific parameters, administrators can ensure that all user accounts meet the necessary security standards. Below are the configurable criteria available within the Password Policy section:
|
Sr. No. |
Fields |
Description |
|
1. |
Minimum Alphabet Characters Count |
Set the minimum number of alphabetic characters (A-Z, a-z) required in a password. This ensures that passwords contain letters, enhancing complexity. |
|
2. |
Minimum Mixed Characters Count (Uppercase/Lowercase) |
Define the minimum number of mixed-case characters required in a password. Enforcing the use of both uppercase and lowercase letters strengthens the password's resistance to guessing. |
|
3. |
Minimum Numbers Count |
Specify the minimum number of numerical characters (0-9) that must be included in the password. Requiring numbers adds an extra layer of protection against brute-force attacks. |
|
4. |
Minimum Special Characters Count |
Set the minimum number of special characters (e.g., @, #, $, &) that must be used in a password. Special characters increase password complexity, making them more secure. |
|
5. |
Allowed Special Characters |
Define which special characters are permitted in passwords. This flexibility helps ensure compliance with organizational security policies and regulatory requirements. |
|
6. |
Minimum Characters Count |
Set the overall minimum number of characters required for a password. Longer passwords typically provide better security by increasing the number of possible combinations. |
|
7. |
Password Block Time |
Configure the duration, in minutes, for which an account will be locked after reaching the maximum number of incorrect password attempts. |
|
8. |
Password Attempts |
Set the maximum number of failed password attempts allowed before triggering account lockout. |
|
9. |
Session Timeout |
Define the session timeout duration in minutes. After this time, inactive sessions will automatically log out, enhancing security by preventing unauthorized access. |
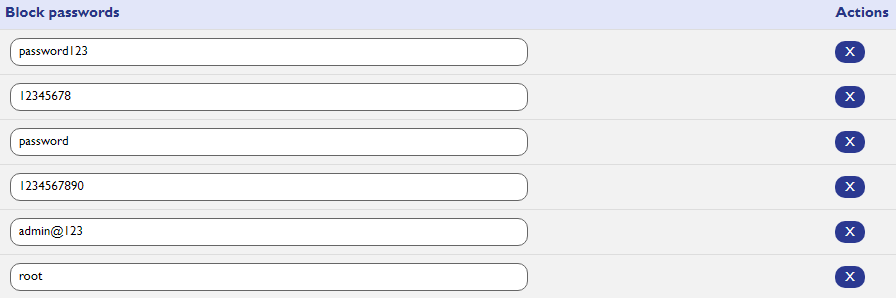
Block Passwords:
In the "Block Password" feature, users have the capability to restrict the use of easily guessable passwords, common names, or birth-dates during the user creation process. This helps enhance security by preventing users from selecting weak or easily predictable passwords, thereby strengthening the overall integrity of the system.
After configuring all the password policy settings ,Save the changes by clicking on the "Apply" button. This ensures that all the configured settings are stored.
Make sure to verify that the settings are successfully updated to ensure security measures are in place.
2FA User List:
This section displays a list of users who have enabled two-factor authentication (2FA). For each user, the system will show the status of their 2FA setup.
|
Field |
Description |
|
Display User List |
View the list of users who have enabled two-factor authentication. This helps administrators manage and monitor 2FA across all accounts. |
|
Disable 2FA |
To disable 2FA for a specific user, click on the "Disable 2FA" button next to their name. This action will remove the additional security layer for that user, reverting their login process to single-factor authentication. |