Removing Product from Intended Environment
Safety Notes
|
|
NOTE: Electrostatic discharge. The device contains components that can be damaged or destroyed by electrostatic discharge. When handling the device, observe the necessary safety precautions against electrostatic discharge (ESD) in accordance with EN 61340-5-1 and IEC 61340-5-1. |
|
|
NOTE: Damage to electronics due to inadequate external protection – no safe fuse tripping in the event of a fault. The electronics in the device will be damaged if external fuse protection is inadequate. • Protect the supply voltage externally in accordance with the connected load (number of WP 500 devices/amount of logic current consumption for each device). • Ensure that the external fuse trips reliably in the event of a fault. |
|
|
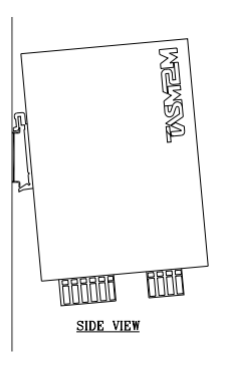
NOTE: Damage to the contacts when tilting. The modules can damage the contacts.
|
|
|
Please note: • During any work on the WP 500 station, the controller or a module, switch off the power supply to the WP 500 station and make sure the supply voltage is protected against unauthorized reactivation. |
Purpose of Shutting Down the WP 500 Controller
Before removal, ensure that the WP 500 Controller is properly shut down
- Disconnecting Power and Network Cables
- Disconnect all power and network cables from the WP 500 Controller to isolate it from the environment.
- The cables should only be removed from the supply connector if you wish to change the terminal point assignment or no longer wish to use the supply connector.
- Open the spring by pressing on the spring lever with a screwdriver (A in Figure 10-2).
- Remove the cable
- Removing Connectors
- Removing the supply connector:
- Release the locking latch, tilt the connector upwards slightly, and remove it from the controller
- Removing the Ethernet connector:
- Release the RJ45 connector by pressing on the Snap-in latch and remove the connector.
Removing the SD card
- Lightly push the SD card far enough into the SD card holder until the snap-in mechanism releases the SD card and partially ejects the SD card from the SD card holder.
- Remove the SD card.
Removing the controller
- Insert a suitable tool (e.g., bladed screwdriver) into the upper and lower snap-in mechanisms (base latches) of the controller one after the other and release the controller .The base latches are locked in place in the open position.
- Remove the controller keeping it perpendicular to the DIN rail.
Created with the Personal Edition of HelpNDoc: Make Documentation a Breeze with HelpNDoc's Clean and Efficient User Interface