Managing menus
The system includes a set of functions function blocks for easily managing hierarchical menus within an embedded HMI application. These functions are intended to be used together with the "Menu" graphic object for embedded HMI screens.
|
|
|
Creating a hierarchy of menus
The following functions are used to create menus. They should be called once when the application starts so that the hierarchy of menus remain available in memory for use with the "Menu" graphic object. The following functions are available:
hMenu := HmiNewMenu (hParentMenu, strTitle); (* creates a main or sub menu *)
hItem := HmiNewMenuItem (hParentMenu, strChoice, idCommand); (* adds a choice to a menu *)
ok := HmiRenameMenu (hItem, strChoice); (* changes the text of a choice or the title of a menu *)
ok := HmiDelMenu (hItem); (* deletes a nemu item of a menu *)
Arguments:
hMenu : BOOL; (* handle of a main or sub menu *)
hParentMenu : DINT; (* handle of the parent menu - specify 0 to create a root menu *)
hItem : DINT; (* handle of a menu or an item to be used in other function calls *)
strTitle : STRING; (* optional title for a menu *)
strChoice : STRING; (* choice text for a menu item *)
idCommand : DINT; (* numerical identifier of a menu item to be used in the application *)
ok : BOOL; (* TRUE if successful *)
Running a hierarchy of menus
Then you can use the HmiMenu function block to activate the hierarchy of menus. First you must declare an instance of it, for example:
MENU : HmiMenu;
You should call the FB instance with the following input arguments:
UP : BOOL; (* the selection is moved up on a rising edge of this signal *)
DN : BOOL; (* the selection is moved down on a rising edge of this signal *)
OK : BOOL; (* the selected sub-menu is selected on a rising edge of this signal *)
ESC : BOOL; (* the parent menu is selected on a rising edge of this signal *)
Menu : DINT (* handle of the root menu *)
Below are the outputs of the HmiMenu function block:
SelID : DINT; (* ID of the selected menu item on a rising edge of the OK input *)
SelPos : DINT; (* position of the selected choice to be passed to the "Menu" graphic object *)
Title : STRING; (* title of the current menu *)
Texts : STRING; (* list of choices to be passed to the "Menu" graphic object *)
Example
Below is an example that creates a main menu with 2 sub-menus:
if not bInitDone then
// create the main menu (root)
hRootMenu := hmiNewMenu (0, 'Main menu');
// create the first sub menu with 2 items
hSubMenu := hmiNewMenu (hRootMenu, 'Menu 1');
hmiNewMenuItem (hSubMenu, 'Choice 1', 101);
hmiNewMenuItem (hSubMenu, 'Choice 2', 102);
// create the second sub menu with 2 items
hSubMenu := hmiNewMenu (hRootMenu, 'Menu 2');
hmiNewMenuItem (hSubMenu, 'Choice 3', 201);
hmiNewMenuItem (hSubMenu, 'Choice 4', 202);
bInitDone := true;
end_if;
Below is a tyipcal call to the HmiMenu function block ("MENU" is a declared instance of the FB):
MENU (bUP, bDOWN, bOK, bBACK, hRootMenu);
case MENU.SelID of
101 : // manage command 1
102 : // manage command 2
201 : // manage command 3
202 : // manage command 4
end_case;
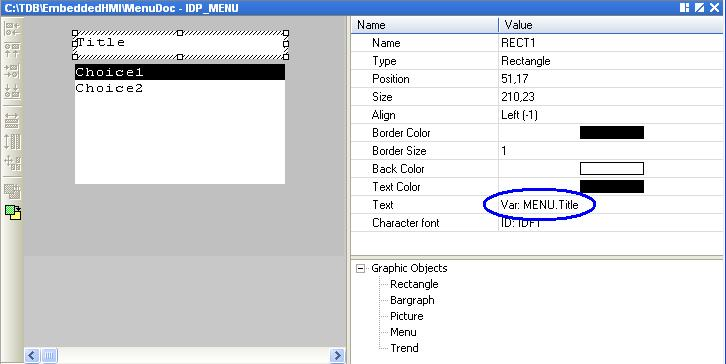
Below is how to configure a text graphic object to diaplay the current menu title using the outputs of the FB instance:
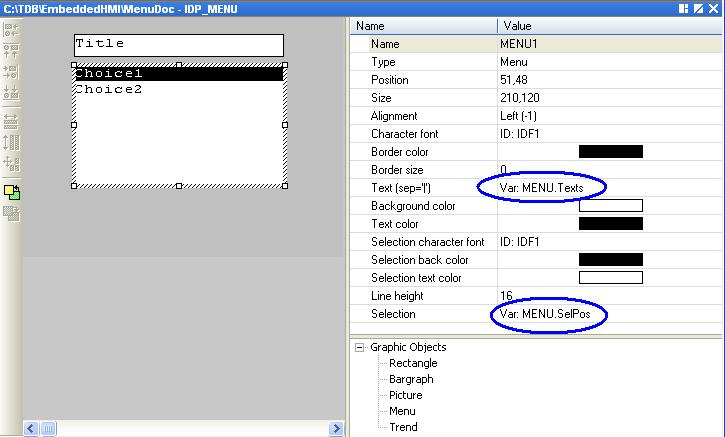
Below is how to configure a "Menu" graphic object to diaplay the current menu title using the outputs of the FB instance:
Managing menus |
|
IEC 61131-3 Automation platform > Embedded HMI > Managing menus |
|
|
Created with the Personal Edition of HelpNDoc: Effortlessly Convert Your Markdown Content with HelpNDoc